Oil stains can cling to metal like a dark, greasy film, especially around seams, bolts, and textured surfaces. A laser cleaner may help remove residue without abrasive contact, but results depend on the material, stain thickness, and machine settings. It is not a universal fix. Some coatings or delicate finishes may discolor or become damaged if exposed to unsuitable laser energy. Small details matter.
This guide explains how to remove oil stains using a laser cleaner through seven practical tips. It covers surface inspection, conservative settings, controlled passes, and checking the work as you go. Before cleaning, consult the equipment manual and confirm that the material is suitable for the process. Wear the protective equipment specified by the manufacturer, and use appropriate ventilation for the work area. Never guess. Start gently, and test a small, inconspicuous spot before treating the full surface. Wipe away loosened residue with a suitable clean cloth, then inspect under good lighting. Even careful cleaning can leave a faint shadow or reveal damage that the oil had concealed. The tips below focus on safe, measured work and realistic expectations, so you can assess whether laser cleaning fits your surface and stain.
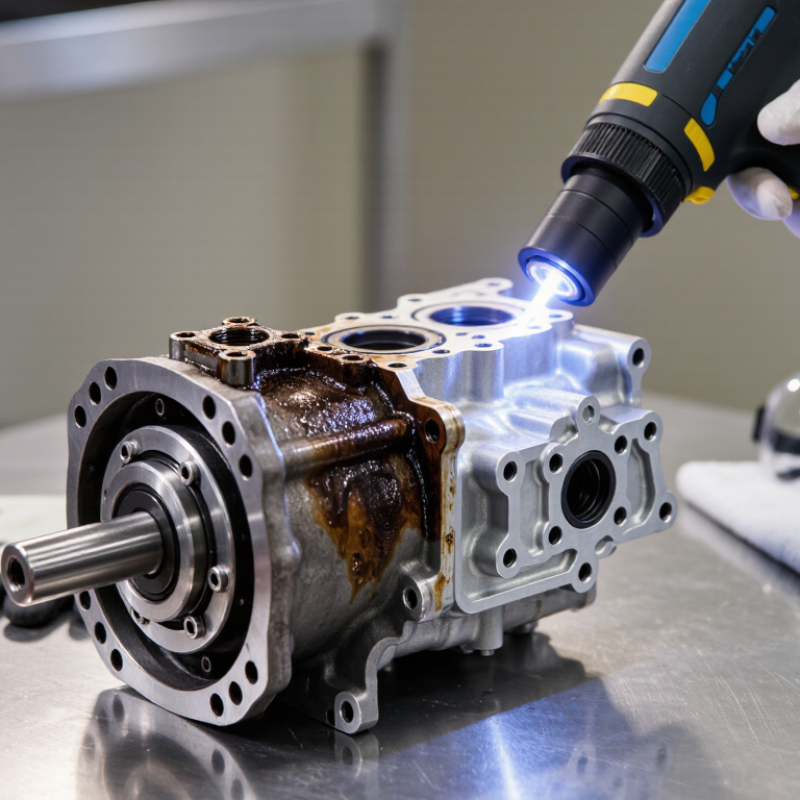
A laser cleaner removes oil by directing short, controlled pulses of light at a contaminated surface. The oil absorbs some of this energy, which can loosen or vaporize the film. The exact effect depends on the oil, the material underneath, and the laser settings. A thin oily sheen may respond differently from sticky, heat-baked residue. The process is not simply “light washing” dirt away. Too much energy can discolor or damage the surface, so careful adjustment matters.
Tip: Start with a small test spot. Use short passes and inspect the area between them. A clean metal panel may reveal a dull patch if the settings are too aggressive. Keep the cleaning head moving; dwelling over one point can concentrate heat. That matters.
Oil can release fumes or fine particles during cleaning, so suitable extraction and protective equipment are important. Check the work area and the machine’s safety guidance before starting. On painted, coated, or delicate surfaces, test an inconspicuous section first. Results may vary across one part, especially where oil has pooled. I would not assume a surface is ready just because it looks clean; inspect it under angled light and confirm the finish remains intact.
Photon energy is calculated from wavelength using E = hc/λ. These values describe individual photons—not oil-removal performance.
Shorter wavelengths carry more energy per photon, but effective oil removal also depends on factors such as pulse duration, fluence, the oil, and the substrate. Test settings on a small area first and follow the laser manufacturer's safety guidance.
Choosing a laser cleaner starts with the material, not the stain alone. Match the wavelength, pulse energy, and scanning speed to the surface and oil residue. A pulsed laser may help limit heat buildup, but settings that work on bare steel can damage paint, plating, or thin sheet metal. Check the equipment guidance and test a small, hidden area first. Small tests matter. Watch for discoloration, pitting, or a change in surface texture before treating the full part.
Prepare a clear, stable work area before cleaning. Remove loose debris and keep oily rags, solvents, and other combustible materials away from the beam path. Do not aim the laser at pooled oil; wipe away excess residue using a suitable method first. Arrange local extraction to capture smoke or particles, and keep bystanders outside the controlled area. A tidy bench helps, but it does not replace proper laser barriers.
Wear eyewear rated for the cleaner’s wavelength and use the protective measures specified for the equipment. Secure the workpiece so it cannot shift during scanning. I have found that a rushed setup often creates more rework than the cleaning itself. Even so, one test may not reveal every surface issue, so inspect the treated area as you proceed.
| Tip | What to Check | Recommended Action | Why It Matters |
|---|---|---|---|
| 1. Identify the oil and the surface | Determine whether the residue is light oil, thick grease, or baked-on contamination. Check the base material, coating, and surface finish. | Test a small, inconspicuous area first. Use a different cleaning method if the substrate or coating is unknown or easily damaged. | Laser energy can affect coatings and delicate surfaces as well as the contaminant. |
| 2. Match the laser to the job | Review the cleaner’s wavelength, pulse or continuous-wave mode, power range, scan options, and manufacturer-approved materials. | Select equipment intended for the material and contamination type. Follow its operating manual rather than relying on a single setting for every job. | Cleaning results depend on the contaminant, substrate, and laser characteristics. |
| 3. Prepare the work area | Look for combustible materials, reflective surfaces, nearby people, and possible routes for smoke or fumes to spread. | Clear the area, control access, and use suitable local exhaust ventilation or fume extraction. Keep a clean, stable work surface. | Laser cleaning can produce airborne particles and fumes; controlling the work area reduces exposure and fire risks. |
| 4. Establish laser safety controls | Confirm the laser’s hazard classification, beam path, enclosure or barrier requirements, and site laser-safety procedures. | Use the required wavelength-rated protective eyewear and trained operators. Keep the beam directed away from people and reflective objects. | Direct and reflected laser radiation can cause serious eye or skin injury. |
| 5. Remove excess oil before laser cleaning | Check whether there is pooled liquid, a thick grease layer, or loose debris on the surface. | Where appropriate, wipe or absorb excess oil using a compatible method before treatment. Dispose of oily materials according to local requirements. | Removing bulk contamination can reduce smoke, splatter, and unnecessary treatment time. |
| 6. Test and adjust conservatively | Observe the test area for discoloration, pitting, coating changes, residual oil, or excessive smoke. | Start with manufacturer-approved settings and make small adjustments. Recheck the surface after each test pass before treating a larger area. | A controlled test helps find an effective process while limiting damage to the part. |
| 7. Inspect and manage residues | Check the cleaned surface and nearby area for remaining oil, loosened particles, and collected waste. | Verify cleanliness using an appropriate inspection method, then collect residues and maintain ventilation until airborne contaminants have cleared. | Inspection confirms the result and helps prevent removed material from contaminating the work area again. |
Safety note: Laser cleaning should be performed only by trained personnel using equipment-specific instructions, appropriate laser controls, and suitable fume extraction. Requirements vary by laser system, material, and workplace.
Before removing an oil stain, set the cleaner to its lowest effective output and use a short, controlled pass. Keep the beam moving across the metal; pausing can discolor or pit a thin surface. Record pulse frequency, power, scan speed, and standoff distance so you can change one setting at a time. The IEC 60825-1 laser-safety classification places continuous-wave visible lasers above 0.5 watts in Class 4, a category requiring strict controls. Many cleaning systems fall into this high-hazard class, so use wavelength-matched protective eyewear and follow the equipment’s safety instructions.
Test a patch about the size of a coin in a hidden area. Wipe away loose grit, then make one pass and inspect under bright, angled light. Check for a dull halo, heat tint, scratches, or oil spreading into the surface. Look closely. If residue remains, adjust only one parameter and repeat; changing power and speed together makes results difficult to judge. Guidance in ANSI Z136.1-2022 emphasizes controlled laser work and appropriate protective measures, but no universal setting suits every alloy, coating, or oil film. A clean-looking patch can still conceal a change in finish, so compare it with an untouched area before proceeding. My first test would be conservative, even if it takes longer.
Move the laser in steady, parallel tracks across the oily surface. Let each track slightly overlap the last, so narrow untreated stripes do not remain between passes. Do not pause over dark spots; extra dwell can heat the metal or spread residue. Start with a small test area and follow the machine’s specified scan speed and overlap settings. There is no universal overlap percentage.
Watch the surface after each pass. A matte, even appearance can suggest progress, but it does not prove that oil is gone. Wipe a cooled test patch with a clean, lint-free cloth and check for residue. If the cloth still picks up oil, adjust the scan pattern or make another controlled pass. Small changes matter.
Keep extraction running, and use eye and skin protection suited to the laser and task. The U.S. FDA’s laser product standard, 21 CFR 1040.10, sets a 500-milliwatt threshold in its Class IIIb and Class IV classification framework; wavelength and exposure conditions also affect classification. That is a serious beam, not a workshop pointer. A tidy pass pattern helps, but it cannot replace the equipment’s safety procedures. I would not trust appearance alone.
Before cleaning, inspect the surface under bright, angled light. Oil can hide in seams, pits, or beneath a loose coating. Check the material and any finish; laser settings suitable for bare metal may damage paint or plating. Test a small, inconspicuous area first. Keep the beam moving, and pause if the surface changes color, texture, or temperature noticeably. A little patience matters.
After treatment, let the part cool before touching or wiping it. Use a clean, lint-free cloth to remove loosened residue, then inspect the surface from several angles. If oily patches remain, reassess the settings and repeat gently rather than lingering over one spot. That judgment is not always obvious; dark residue can look like a stain even when the oil is gone. Check seams again, and keep the cleaned item dry. For parts prone to corrosion, apply a suitable protective coating only after confirming the surface is clean and cool.
Identify the metal, its finish, and the oil residue. Settings for bare steel may harm paint, plating, or thin sheet metal.
Secure the part and clear loose debris. Move oily rags and combustible materials away from the beam path. Use local extraction for smoke or particles.
Wear eyewear rated for the cleaner’s wavelength. Use the specified barriers, and keep bystanders outside the controlled area. A tidy bench is not enough.
Start at the lowest effective output and make a short pass. Keep the beam moving; pausing can discolor or pit the surface.
Try a coin-sized patch in a hidden spot. Inspect it under bright, angled light before cleaning the full part. Small tests matter.
Pause if you see a dull halo, heat tint, scratches, pitting, or a change in texture. Compare the patch with untouched metal.
Let the part cool, then wipe it with a clean, lint-free cloth. Check seams and inspect the surface from several angles.
Change only one setting at a time, then repeat gently. Dark residue can be misleading; I would not assume it is still oil. That judgment can be tricky.
This guide explains how to remove oil stains using a laser cleaner by first describing how focused laser energy lifts or breaks down oil and surface contamination. Choosing suitable equipment depends on the material and the type of residue. Before cleaning, prepare a clear, well-ventilated work area, secure the object, and use appropriate protective equipment. Begin with conservative settings and test a small, inconspicuous spot to check that the surface responds safely.
Once the settings are confirmed, move the laser steadily across the stained area in controlled, overlapping passes. Avoid lingering in one place, since excessive heat or exposure may affect the underlying material. Pause as needed to inspect the results and adjust the approach rather than increasing power abruptly. After cleaning, check for remaining residue, remove any loosened particles using a suitable method, and allow the surface to cool. A final inspection helps confirm the stain is gone and the material remains in good condition.

Jigsaw Machine