Ghosting can turn a clean laser engraving into a faint double image. Edges may appear repeated, especially around small letters, circles, and sharp corners. The defect often looks minor at first. Under angled light, it becomes obvious.
So, what causes ghosting effects in laser engraving? In most cases, the answer involves mechanical vibration, excessive acceleration, loose belts, or an unstable workpiece. Incorrect speed and power settings can make the symptom worse. A rotary attachment may also shift slightly during movement. I have seen a single loose pulley create a shadow that looked like a software problem. It was not.
Kevin Wood, a technical support specialist at Epilog Laser, has advised users, “Ghosting is usually a motion-control problem before it is a laser-power problem.” This practical view matters because many operators immediately reduce power. That may darken the surface without correcting the movement. The machine still needs inspection.
This guide explains how to fix ghosting in laser engraving through a careful diagnostic process. You will learn how to check belt tension, lens alignment, table stability, acceleration, and material placement. Simple tests can reveal more than random setting changes. Start with a low-risk pattern. Watch the edges closely.
Some causes overlap. Not every machine behaves identically. That is worth remembering. A setting that works on one engraver may fail on another because of different firmware, optics, or frame construction. Reliable troubleshooting requires notes, repeatable tests, and patience. Even experienced operators can miss a loose fastener.
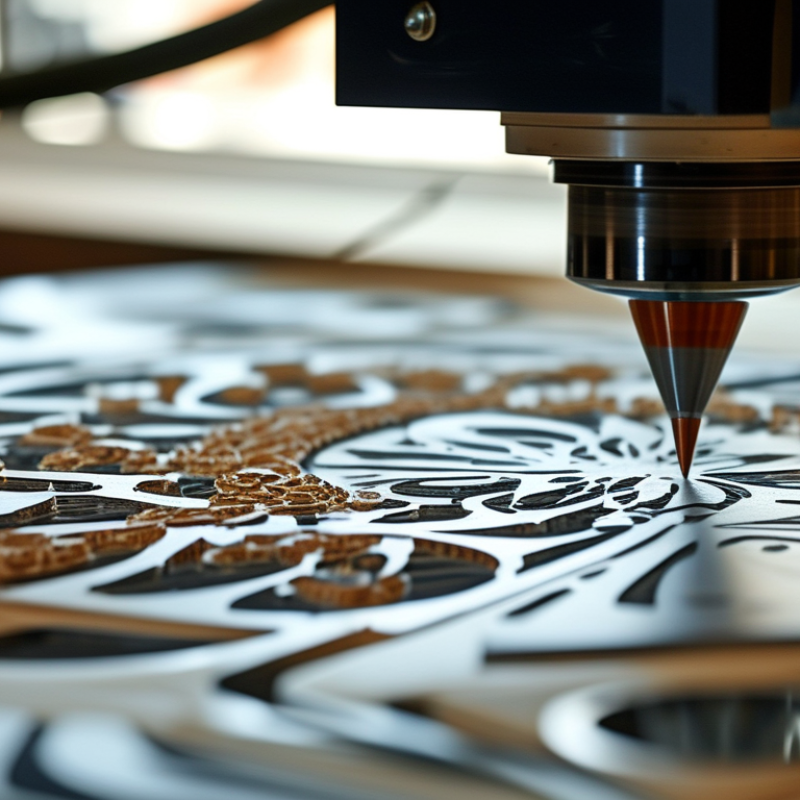
Ghosting in laser engraving usually comes from motion errors, not the laser source itself. A faint duplicate appears beside letters, circles, or sharp corners. Loose belts, pulley slip, excessive acceleration, and frame vibration are common causes. A 2024 Grand View Research report places the laser engraving machine market above USD 3 billion, showing how widely these systems are used. Yet many operators still diagnose by eye alone.
I once reduced power when a repeated edge appeared. That assumption was wrong. The real problem was a loose drive pulley and aggressive acceleration. ISO 230-2 recommends checking positioning accuracy through repeated movements, while ISO 9283 focuses on robot positioning and repeatability. These standards support a practical test: engrave a small square at low speed, then repeat it at higher speed. If the shadow grows, motion control is the likely cause. If it stays fixed, inspect focus, optics, or material movement. Dust on the lens can also enlarge edges and create misleading halos.
Tips: Tighten belts without over-tensioning them. Mark pulley shafts with a fine line. Watch whether the mark shifts after several passes. Reduce acceleration before lowering power. Check the workpiece with a ruler. I would also repeat the test after cleaning the lens, because one missed maintenance step can distort the diagnosis. Record speed, acceleration, focus height, and material batch. Small notes often reveal patterns that memory misses.
Ghosting is usually caused by mechanical vibration, excessive scan speed, loose belts or pulleys, and incorrect acceleration settings. The chart shows a practical diagnostic priority index, where higher values indicate causes that should be checked first.
Start by reducing scan speed and acceleration, then inspect belt tension, pulleys, linear rails, and the workpiece fixture. If the ghost image appears at a regular distance after sharp edges, mechanical resonance or bidirectional scanning alignment is especially likely.
How to Fix Ghosting in Laser Engraving?
Ghosting usually points to unwanted movement in the mechanical system. Start with the frame. Turn off and unplug the engraver before checking anything. Push the gantry gently from both sides. It should move smoothly, without rocking or scraping. If it rocks, inspect the frame joints and corner screws. Measure both frame diagonals. They should match closely. A small difference can make circles look uneven.
Inspect the drive belts, pulleys, rails, and wheels. Belts should feel firm, not painfully tight. Do not tighten them by guesswork. Excess tension can restrict movement and wear the bearings. Check each pulley’s fastening screw, especially near the motor shaft. A loose pulley may create repeated shadows beside sharp edges. Clean the rails with a suitable lint-free cloth. Remove dust, resin-like residue, and tiny wood particles. Then check whether the wheels contact the rails evenly.
I have occasionally over-tightened a belt while troubleshooting. That made the movement worse. My first diagnosis was wrong. Use a small square and circle test file at low speed. Watch whether the ghosting appears after acceleration or during direction changes. Compare horizontal and vertical lines. If only one direction shows shadows, inspect that axis again. Recheck the gantry after several test runs, because vibration can loosen a connection that initially seemed secure.
Ghosting in laser engraving often appears as faint duplicate lines beside sharp edges. It usually points to motion vibration, not a dirty lens. I check loose belts, pulleys, rails, and the workpiece before changing software settings. A small movement can leave a shadow around letters.
Reduce acceleration before reducing speed. High acceleration makes the laser head overshoot during rapid direction changes. Try lowering acceleration by 20% to 30%, then engrave a small test grid. If the shadow decreases, continue in small steps. Excessively low acceleration can create uneven shading, though. I have made that mistake.
Speed also needs careful adjustment. Very high speed may excite frame vibration, especially on large fills. Very low speed can increase heat and darken edges. Test several speeds while keeping power constant. Use the lowest power that produces the required contrast. Check horizontal and vertical lines separately, because one direction may reveal looseness more clearly.
Engraving settings matter as much as motion settings. Increase line spacing slightly if filled areas look swollen. Use overscan when available, so the head reaches working speed before engraving begins. Keep the material flat and secure. On thin wood, I once blamed acceleration when the panel itself was flexing. A ruler and side lighting exposed the problem. Record each test value, including speed, acceleration, power, spacing, and material thickness. Small notes prevent repeated guesses.
| Adjustment Area | Recommended Starting Range | Visible Ghosting Symptom | Recommended Action | Why It Helps | Priority |
|---|---|---|---|---|---|
| Engraving Speed | Reduce by 10–25% | Faint duplicate lines or shadows appear beside vertical edges, especially after rapid direction changes. | Run a test grid at the current speed, then repeat at 10%, 20%, and 25% lower speed. | Lower speed reduces the kinetic load on the moving assembly and gives the system more time to settle. | High |
| Acceleration | Reduce by 20–50% | Ghosting is strongest at the beginning and end of scan lines or around corners. | Lower acceleration while keeping power and focus unchanged. Compare a small geometric test pattern. | Lower acceleration reduces vibration, mechanical flex, and overshoot when the laser head changes direction. | High |
| Scan Direction | Use one-way scanning for diagnosis | Shadows differ on left-to-right and right-to-left passes, or mirrored edges appear inconsistent. | Switch temporarily from bidirectional scanning to unidirectional scanning. | One-way scanning removes directional registration differences and helps identify motion-system backlash or timing errors. | High |
| Line Interval | Use the material-appropriate focal overlap | Edges look rough, doubled, or uneven when closely spaced scan lines overlap excessively. | Test a modestly larger line interval, such as 0.08–0.12 mm for many common diode-laser photo or fill jobs. | Excessive overlap can increase heat accumulation and make vibration-related artifacts more visible. | Medium |
| Power and Heat | Reduce power by 5–15% or increase speed equivalently | Dark halos or widened edges are accompanied by excessive charring, melting, or discoloration. | Change only one variable at a time and confirm that the mark remains deep or dark enough for the application. | Lower heat input reduces thermal spread, which can visually exaggerate a motion artifact. | Medium |
| Overscan | Enable overscan where supported | Ghosting is concentrated at the left and right edges of filled artwork. | Add sufficient overscan so the head reaches operating speed before entering the design area. | Overscan moves acceleration and deceleration outside the artwork, improving energy consistency at the edges. | High |
| Acceleration Symmetry | Use the same values in both scan directions | One side of the image is sharp while the opposite side has a repeated shadow. | Check whether the controller applies identical acceleration, offset, and timing values in both directions. | Asymmetric motion parameters can create different registration positions for alternating scan lines. | High |
| Focus and Work Height | Set the manufacturer-specified focal distance | Lines are broad, soft, or uneven across the entire engraving rather than only at direction changes. | Refocus using a ramp or stepped focus test, and verify that the workpiece is flat and level. | An incorrect focal position enlarges the laser spot and can be mistaken for ghosting. | High |
| Lens and Nozzle | Clean and securely fitted | Repeated blur, flare, or offset marks remain after motion settings are reduced. | Clean the lens with suitable optical-cleaning materials and check that the lens or air nozzle is not loose. | Contamination or a misaligned optical component can scatter the beam and produce halos around engraved features. | Medium |
| Belts and Pulleys | Firm, aligned, and free of visible damage | Ghosting changes location or severity after the machine reverses direction. | Inspect belt tension, pulley grub screws, idlers, and rail alignment; correct looseness without overtightening. | Backlash and belt resonance allow the head to move briefly after the commanded position changes. | High |
| Frame and Workholding | Rigid and vibration-free | The artifact is worse on a table, stand, or material that can move during engraving. | Secure the machine and workpiece on a rigid, level surface; remove loose panels and unsupported extensions. | External vibration or workpiece movement can create a second apparent mark beside the intended engraving. | High |
| Test Pattern | Use 10–30 mm squares, lines, and text | The cause is difficult to isolate in a large, detailed design. | Test horizontal lines, vertical lines, corners, small text, and filled blocks separately. | Simple patterns reveal whether the problem is linked to direction, acceleration, heat, focus, or mechanical play. | High |
| Change Control | Adjust one parameter per test | Improvements cannot be reproduced because several settings were changed together. | Record speed, acceleration, power, line interval, focus height, material, and scan direction for every test. | Controlled testing identifies the setting that actually reduced ghosting and prevents inconsistent production results. | Medium |
Practical test sequence: First check focus, workholding, belts, pulleys, and frame rigidity. Then reduce acceleration, reduce speed, test one-way scanning, and fine-tune power and line interval for the specific material. The ranges above are starting points rather than universal production settings; always validate them with a small test pattern and appropriate ventilation and laser-safety controls.
Ghosting in laser engraving often appears as a faint duplicate beside sharp edges. It usually comes from vibration during rapid direction changes. I once blamed the laser settings, but the loose worktable was the real cause. Check the frame, feet, rails, and belt tension before changing power.
Place the engraver on a rigid, level surface. A thin wooden desk can amplify movement. Tighten accessible screws, then test the machine with a small square pattern. Reduce acceleration and travel speed slightly. This gives the frame more time to settle. Do not overtighten belts, because excessive tension can create uneven motion and premature wear. Small changes matter.
Material stability is equally important. Secure thin wood, acrylic, or coated sheets with suitable clamps or low-profile supports. The workpiece should not rock when pressed gently near its edges. Uneven material can also change focus, producing soft or doubled marks. Measure the surface at several points and adjust the focus distance carefully. For flexible sheets, adding a flat backing surface may help, but it can affect heat transfer. Test on scrap material first. I still find one problem: a stable frame cannot correct warped stock or an incorrectly aligned gantry. Review both the machine and the material before trusting a single test result.
Ghosting in laser engraving often appears as faint duplicate lines beside sharp edges. It usually points to vibration, loose motion components, excessive speed, or sudden direction changes. I have seen clean artwork become blurry when the carriage reversed direction too quickly. The flaw was not always obvious on a small preview.
Test the results before starting a full project. Engrave a small grid with repeated lines, circles, and fine text. Change one setting at a time, such as speed, power, or acceleration. Inspect the sample under bright side lighting. Compare the left and right edges of each line. If shadows appear consistently on one side, check belts, wheels, screws, and the work surface. Also confirm that the material sits flat and the lens is clean. Record every setting, even failed tests. Those notes prevent guesswork later.
Tips: Use a low-risk scrap piece first. Reduce speed when details look doubled. Tighten components carefully, but do not overtighten them. Check focus at the actual material height. Run the same test twice to confirm repeatability. If the second result changes, the machine may still have movement or heat issues. I sometimes blame settings too quickly, while an uneven panel causes the real problem. Leave a short pause between tests when heat may affect the material. Save photographs with your settings. A simple test log becomes valuable on future projects.
: Ghosting appears as a faint duplicate beside letters, circles, or sharp corners. It often looks like a pale shadow.
Loose belts, pulley slip, vibration, and high acceleration are common causes. Sudden direction changes can worsen the effect.
Not usually. Motion problems may be responsible. Check belts, pulleys, screws, rails, and the work surface before changing power.
Engrave a small square at low speed. Repeat it at higher speed. If the shadow grows, inspect motion control.
Place the machine on a rigid, level surface. Tighten accessible screws carefully. A thin desk may amplify vibration.
Yes. Thin sheets can rock, warp, or change height during engraving. Press the edges gently and check for movement.
Use suitable clamps or low-profile supports. Add a flat backing surface for flexible sheets, then test heat effects on scrap.
Yes. Dust may enlarge edges and create halos. Clean the lens, then repeat the same test.
Record speed, power, acceleration, focus height, and material batch. Save photos too. Small notes reveal patterns memory misses.
Test a small grid with lines, circles, and fine text. Change one setting at a time. Run the test twice.
The machine may still vibrate, shift, or heat the material. Leave a short pause between tests. One test can mislead.
They blame laser settings too quickly. I have done that. An uneven panel or loose worktable may be the real problem.
Ghosting in laser engraving appears as faint duplicate lines, shadows, or repeated marks beside the intended design. To understand what causes ghosting effects in laser engraving, start by checking mechanical movement, including loose belts, worn rollers, misaligned rails, or an unstable laser head. Excessive speed, acceleration, or unsuitable engraving settings can also create sudden movements that leave unwanted traces. In addition, vibrations from the machine, worktable, or material may reduce precision, especially when engraving large or detailed designs.
To fix the problem, inspect and align the mechanical system, tighten or replace worn components, and make sure the work surface is level. Reduce speed and acceleration gradually, then adjust power and interval settings through controlled test patterns. Secure the material firmly and isolate the engraver from sources of vibration. After each adjustment, compare test results and record the settings that produce clean edges. Regular maintenance, stable material placement, and careful parameter testing can help prevent ghosting in future projects.

Jigsaw Machine